Do you know green and red chilies come from the same plant? But how? The first two pickings yield green chilis – subsequently, they yield ripe red chilis. Actually, I think you already know that. Don’t mind me. But I found out about it only today, and needless to say, I was amazed.
Anyway, this fall, my kitchen garden exploded with red chili peppers. So, we used them in pretty much every savory dish we made. But we were still left with heaps and heaps of glossy red chilis.
If you know me, you know I’m big on zero waste. There was no way I would let the chilis go to waste. I brined them, dried them, and even froze them for later use since these red-hot fruits (yes, fruits) have such a short harvest season!
The leftover chilis that would be consumed in the near future were refrigerated. How? I’ll tell you all about it step by step in this blog.
My food photography skills are shabby, but I’ve tried to document the entire process of storing red chilies in the fridge correctly.
Table Of Content
How To Store Red Chilies In The Fridge?
If you refrigerate red chilies correctly, you can use them for 3-4 weeks. Like most other stemmy fruits and vegetables, you should first remove the stem. Next, place the chilies in a plastic container between two kitchen towels. Finally, place the container in your fridge’s crisper drawer. This way, your chilies will not rot or lose spiciness.
Let me explain in detail below.
Sort Your Chilies And Remove The Stems
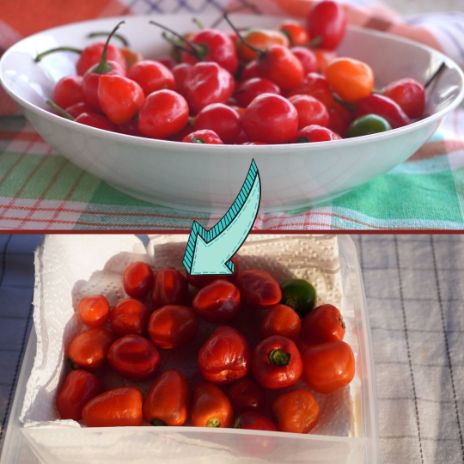
The first step is to get rid of the rotten chilies. Any chili showing signs of spoilage should be removed. If the chili gives off a foul smell and has brown or white spots and a worn-out texture, it’s spoiled.
The next step is to remove the stem from the chilies since the stem encourages fruits and vegetables to rot faster. The stems produce a gas called ethylene in large amounts, so the fruit ripens more quickly.
Make sure you use latex gloves while handling the chilies for obvious reasons. I idiotically missed this step. You can imagine what happened when I removed my contact lenses at night.
To remove the stems, you can simply use your good old hands to yank them off. If you’re going to use a knife, make sure to cut the stems as close to the flesh of the pepper as possible.
If you chop too much, the chilies will rot way too fast since there’s a large surface area of pepper for the air to react with.
You don’t have to worry about washing chilies beforehand – it will only increase the moisture content. You can always wash them later – as much as you want – when you take them out for recipes.
Place Your Chilies The Right Way
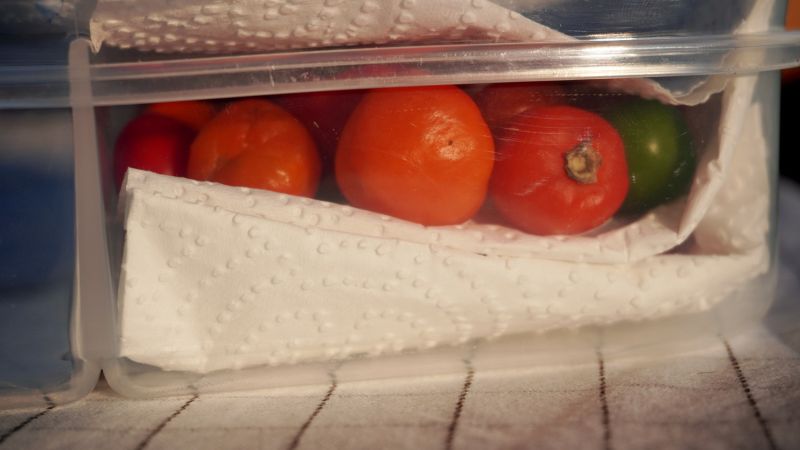
The next step is placing the chilies in a clean, sealable plastic container. First, place a kitchen towel in the bottom of the plastic container and lay down a single layer of chilies.
If you have more chilies at hand, place a paper tower on top of the first layer and lay the second batch of chilies again. Repeat this process until the container is full. Remember, the top layer should be a kitchen towel.
So, why are we using kitchen towels? That’s because the towel will absorb any extra moisture produced by the chilies during the refrigeration process.
If you are worried the chilies will produce too much moisture and become soggy, you can first dry them in the sun or the oven. Reportedly, sun-drying can reduce the moisture content to just 10–15%.
Store The Chilies In The Crisper Drawer
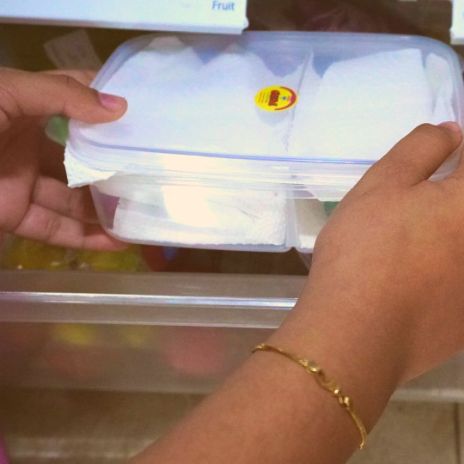
Once the container is sealed, place it in the crisper drawer, where it will remain fresh for the next 3-4 weeks. Remember, the chilies should go inside the crisper drawer – not anywhere else. This is because the crispers offer a relatively more humid environment than rest of the fridge interior.
The crisper drawer will extend the life of the chilies by controlling the airflow around them through the vents.
These drawers come equipped with adjustable humidity vents that allow you to close off the airflow to create more humidity or open it up to create a low-humidity environment.
The rule of thumb is to use a low-humidity setting for food that rots quickly.
While at it, let me show you how I froze my chilies.
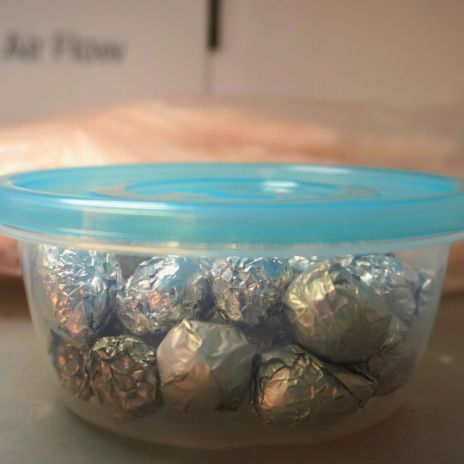
How To Freeze Red Chilies?
First, wrap each chili with aluminum foil and ensure all parts are covered. Next, place the chilies on a plate and freeze them overnight or at least for a couple of hours. Once frozen, transfer the chilies to a sealable plastic container or a ziplock bag, and toss them in the freezer.
The chilies will be good for at least the next 3 months.
Now, let’s have a look at the intricacies.
Wrap The Chilies With Aluminum Foil
This particular step may seem painstaking, but you can’t afford to miss it. But first, remove the stems, as I explained above. Cover each chili generously with aluminum foil, so no part is exposed to air.
Once again, discard any chili that looks mushy or limp. Ones with brown or white spots and rancid smell should be avoided too.
Freeze The Chilies For A Few Hours
Next, lay the chilies on a plate with little space between them. Put the plate in the freezer for a few hours. If you want, you can freeze them overnight, but that would increase the chance of freezer burn.
Keep the temperature on the medium setting so that chilies get very cold but don’t over-freeze.
Store Correctly And Freeze For 2-3 Months
Once the chilies are frozen, transfer them to a ziplock bag with the foil wrap intact. This time, make sure you don’t stack the chilies since they can bruise over time after being weighed down.
When it’s time to thaw the chilies, they’ll come out a little floppy but maintain their flavor and heat intact. If you’re looking for texture and crunchiness, don’t freeze them in the first place!